Saturday, December 31, 2016

Making a Custom PC Gamepad with Arduino


What: Making a simple gamepad from an Arduino that you can use on the computer

Why: I wrote another article earlier this year about using the RXTX java library involving basic communication with a computer and finally got a free weekend to make an even better project using that same tech. Furthermore, a Twitch streamer by the handle 'Rudeism' has become well known for using a 'Makey Makey' microcontroller in video games, and it should be noted that he inspired me to finally get working on my own fun game controller.

Required: 
- Arduino, Arduino IDE
- Switches, buttons, and/or joysticks
- Computer
- Java
- RXTX Java Library
- Code available on my Github

Notes: For this tutorial, I am using an old analog computer joystick. It used a gameport adapter, but I have since cut it off so I can get at the wires directly. The important take away is that I have wired the outputs from the potentiometers of the joystick directly into the analog input pins of the Arduino. Further, the buttons from the joystick are also wired directly into the digital input pins. The program files available for this tutorial assume only two axes and two buttons. If you want to make a more complicated gamepad, I encourage you to do so; the concept is the same. 

I am using an Arduino Uno R3. The Uno does not have native HID support which is why we need the Java program on the computer. The joystick I am using an old InterAct Raider Pro Digital that I found while thrifting. This tutorial does not require flashing the Uno’s core firmware.

Brief: The basic idea is that the Arduino will receive the inputs (either digital or analog) from a button or joystick you have and send it over the serial connection to your PC. The PC will then parse that input into something actionable. Using the Java ‘Robot’ class, your Java application will move the mouse, click a button, or enter a keystroke. Here is an abstract diagram for how it should work:


Steps:

1. Connect your switches, buttons, and potentiometers to the Arduino


[x-axis potentiometer signal] -> [analogPin0]
[y-axis potentiometer signal] -> [analogPin1]
[trigger button] -> [digitalPin3]
[thumb button] -> [digitalPin4]
[GND] -> [GND]
[5v] -> [5v]

2. Upload the Arduino sketch
     View my sketch example video HERE.

3. Run the Java application
     That's it! Your potentiometer inputs now drive your mouse, the trigger button is a left click, and the thumb button is a right click.

Troubleshooting:

-If you need more help with the RXTX library specifically, please refer to my previous article on using the library HERE.

-If you have questions about the process or this project in particular, post a comment and I'll try to help you out.

More process photos:
(Testing direct connections)

(Connections soldered and labeled)

(Ready for game testing)

Making Humanistic Mouse Clicks with Java Robot Class

Preface: Java's Robot class allows you to send mouse and keyboard signals to the operating system through APIs designed for indirect interaction with the PC. By using this Java class, we can perform actions like scrolling, clicking, and typing without actually doing so.

Problem: While experimenting with the Robot class for an Arduino gamepad I was making, I discovered a problem with clicking the virtual mouse. Let's look at the code.

This is how it is explained in Java examples, and how other users have taken to using the mouse click:
Robot robot = new Robot();
    
    robot.mousePress(InputEvent.BUTTON1_MASK);
    robot.mouseRelease(InputEvent.BUTTON1_MASK);
The button is pressed and immediately released. Even adding a delay by way of a Thread.Sleep will still result in the same problem. What if I have a function that detects an event and presses the mouse button? This certainly works for that case, but what if I am holding the mouse button down? Instead, this code will simulate a set of rapid clicks for as long as the button is held. That's not the behavior I wanted. Furthermore, the right click code was verbatim with the mask changed to account for the different button. Right clicking did not work at all since it opened and close any context menus far too fast to be useable.

Solution: Using some extra state information, we can track whether or not the mouse button should be held down, or if it should be released. Assuming the event triggers occur often enough, the user should not notice whether the mouse is only clicked or held for any period of time.

int currentLeftClickState = 0;
...
if(trigger == 0 && currentLeftClickState == 1){
robot.mouseRelease(InputEvent.BUTTON1_DOWN_MASK);
this.currentLeftClickState = 0;
}
else if(trigger == 1 && currentLeftClickState == 0){
robot.mousePress(InputEvent.BUTTON1_DOWN_MASK);
this.currentLeftClickState = 1;
}
In my example, I declare a simple flag using an int that will represent the current state.  When I receive the literal 'trigger' my function code will validate the trigger against the current state. Only if there is a difference between them, do we need to change the mouse behavior.

This code allows you to now select windows, drag objects, open context menus correctly, and even select multiple lines. Cool stuff right?

To see the project this code was written for, please check out my GITHUB.

Saturday, December 17, 2016

The Costs of Developing Games

I've been working on a simulator/game, and decided to investigate how much it would actually cost to deploy to as many platforms as possible. The platforms I investigated were the following: Xbox One, PS4, Wii U, and iPhone. My simulator wouldn't actually be appropriate for the iPhone given the system constraints and minimal points of interaction available to the user, but I included it for completeness. The areas I have considered in my investigation are the following: development kit, developer registration, listing fees, patch fees, and perks.

You'll find that most of the tangible costs, like price of dev kits and registration, are actually undisclosed, but we can guess at these costs based on user testimonials from various threads and online forums. Where applicable, I have posted links to any sources, though due to the limited lifetime of forum threads, forum links are not provided.

Xbox One / UWP
The costs of developing for the Xbox are a little more complicated since Microsoft has been pushing a unified platform dubbed "UWP." This means that the costs for developing a game on Windows are very similar to that of a game on Xbox, but the development kit costs change. If you are developing for Windows, you need a Windows computer. If you are developing for the Xbox, you'll need an Xbox. Here is a breakdown of the costs I was able to source:

  1. Development Kit : Xbox One console = $250.00
  2. Developer Registration: One time fee  = $19.00
  3. Listing Fee:                                           = $Estimated at 'couple hundred'
  4. Patch Fees:                                            = Free as of 2013
  5. Perks:                                                     = Two free development kits (Qualified independent developers)
The listing fee probably varies based on the studio budget, but if we estimate 'couple hundred' to have a ceiling of $200 dollars, the total cost of developing a game for the Xbox One is $469.00. This doesn't account for multiple development kits, but if you are a qualified independent developer, the price could be as low as $219.00 since you would get the kits for free.

Playstation 4 
Most of the price for developing on the PS4 is going to come from the development kit since you cannot currently turn any PS4 unit into a dev system like you can with the Xbox One. Let's take a look at the breakdown.
  1. Development Kit: PS4 Dev Console               = $2,500.00
  2. Developer Registration: Online Registration   = Free
  3. Listing Fee:                                                      = Unknown
  4. Patch Fees:                                                       = $10,000.00
  5. Perks:                                                                = First two patches are free. Free ESRB ratings
Right off the bat, we see that the cost of the development kit is already $2000.00 more than the Xbox One. Unfortunately, I could not find any information on the listing fee for selling your game through their online marketplace, but based on the other numbers, it is likely to be relatively expensive. Given the numbers I could find, I am going to conclude that the total cost of developing a game for the PS4 is probably about $2,500.00 to $3,000.00. However, if you are indie developer, you may be in luck. I found multiple accounts of forum users claiming that Sony was generously lending indie developers a free PS4 dev kit for the first year.

Wii U
Nintendo's next console is actually the Switch, but since it is still very new, there was not much information I could find on the price of developing for that system. Instead I will look at the Wii U where more information on development costs was available.
  1. Development Kit: Refurbished = $1,500.00
  2. Developer Registration:            = Unknown
  3. Listing Fee                                = Unknown
  4. Patch Fees:                                = Free
  5. Perks:                                         = Unity Pro License
Unfortunately, there are quite a few unknowns when looking at developing for the Wii U, but the development kit costs were probably the easiest to find compared to the other systems. If you are not buying a refurbished kit, the price rises another 1,000.00. Overall, if we assume that the registration and listing fees are free, the total cost of developing a game for the Wii U is about $1,500.00.00 with zero patching fees.

iPhone
The iOS platform is a very different system than the other platforms since the gaming system is essentially a hand held device. With the physical limitations comes limited hardware capabilities. None the less, let's look at the numbers I was able to source for developing a game on iOS:
  1. Development Kit: iPad/ iPhone = $200.00 - $600.00
  2. Developer Registration:             = Free
  3. Listing Fee                                 = $100.00 /Year
  4. Patch Fees:                                 = Free
  5. Perks:                                         = External test users (up to 200)
Developing for the iPhone or iPad seems to carry the lowest cost, but it is also the only platform that I could identify as having a recurring cost. The listing fee for applications and games is written as $99/yr, but it was unclear if the developer was responsible for paying the annual price after original game/application submission. Even with the recurring fee, developing for iOS appears to carry the lowest cost and the total cost of developing a game for the iPhone is about $300.00 if you are using a cheaper iOS device.

Hopefully you found this as informative and interesting as I did, and that it helps fellow developers make informed decisions about the platforms they choose. For my simulator, I will likely develop for the Windows platform first, and then expand if it makes sense. 

If you have more recent information on the costs associated with developing a game for various platforms, please contact me, and I would be happy to update the information provided above.

Monday, December 12, 2016

Remapping the Special Macro Keys on an Asus Laptop (G752)


This was one of those really good puzzles that almost didn't pay off. Asus has a preinstalled macro key application for mapping the macro keys on their laptops, but as you have probably discovered, it only works for a subset of the keys, not all of them. Asus conveniently left the Stream/Record/Camera macro key out in an attempt to prevent you from changing it. The key looks like this:
(The key on the far left with the camera symbol)

I am using a G752VS, and by default, that key is bound to an application called XSplit. XSplit is great, but I favor OBS and wanted to remap the record macro key to OBS instead of XSplit. I searched plenty of Asus forums where users had found out how to remap the Steam or Shadowplay macros on older laptops, but no one had figured out how to remap the Record macro yet. Bummer for me, but I was determined so I set off to figure this out. Surely there had to be a way to change it. 

You've probably looked around and seen plenty of 3rd party programs that individuals have written, and though I am sure they do the job well, I didn't want such a heavy solution to the problem. The two that I considered work by intercepting the key event and redirecting it. This is a great work-around, but I wanted to deal with the root cause, and not just the symptom. (BTW, if you call Asus Support, they'll tell you it cannot be changed)

Thanks to 'RARES95' in this thread I used the HControl.exe binary as my starting point. Just as they did, I examined it in a hex editor to see what sort of clues I could dig up:


I did a search for 'XSplit' and found only a single instance of the string. Here is a more focused image of just the interesting stuff:

(XSplit.ControlMessage.XGC)

Surprisingly, the XSplit clue I was looking for was right next to the old 'Steam/Shadowplay' strings. Unfortunately, this time around the engineers didn't just place the application path into the executable which would have made remapping the key very similar to the Steam macro trick posted in the forum. I wrote down the surrounding clues, pretty much everything I highlighted, and went looking, starting with the registry. I do most of my work on Linux, and have very little technical prowess on the Windows platform, but I had a good feeling the registry editor might be a good place to start looking for more clues. 

Turns out I was wrong. One of the strings I wrote down was 'InstallPath', which as it happens, is actually a registry key under the SplitMediaLabs/XSplit registry group. The value was the launch executable for 'XSplit' so I changed it to point to my test application and restarted explorer. Didn't work, hitting the record macro key still opened XSplit. So I changed that back. Next I spent a few minutes Googling for the string 'XSplit.ControlMessage.XGC.' Nothing. Seems like it had to be something internal to the Asus application, not something you would find on the web. Then I started doing the equivalent of 'grepping' through every file related to the ATK package (Asus' macro key management software) and the XSplit program files. That string wasn't there, but I got a metric ton of results for things like 'XSplit' or 'ControlMessage' or especially the 'XGC', just not in the same string like I found in the hex editor. I was getting nowhere.

Just when I was about to give up, I looked again at some of the less obvious clues I had originally overlooked:
(schtasks & ATK Package)

Then I looked up ATK Package A22126881260 and found an XML file under the Asus ATK Package directory in program files. The XML file didn't give anything away though. It mentions an executable which is used for simulating apps run in the Windows' store, but it's a red herring. 


Like I previously stated, I am a not a Windows guru, but if I was, 'schtasks' probably would have stood out more to me earlier. I looked it up and it's actually a Windows cli tool for scheduling tasks or running programs; essentially a cron. So I opened the Windows' Task Scheduler program and looked through the list. Lo and behold, there it was:

(ATK Package A22126881260)

If you click the 'Actions' tab, you'll see this scheduled task makes a call to C:\Program Files\SplitMediaLabs\XSplit\...XSplit.Gamecaster. Found it! 

Since you've come this far, I'll make the last part short for you. If you edit this scheduled task, you can replace the action of calling XSplit with any other script of program you want. Once you've edited the task, close Task Scheduler and press the Stream/Camera/Recorder macro key. It doesn't open XSplit anymore does it? Congrats, your computer belongs to you again.

This was fun wasn't it?
Thanks for reading!

Update: I made a Youtube video on how to do this since that might be easier than a wall of text. Enjoy!


Saturday, December 10, 2016

Long Term Test Result Analysis with TUSK

This is Tusk. Tusk was made to remember your test result and do analysis for you.

I came up with Tusk to solve a problem frequently associated with testing. Automation allows us to generate testing results more quickly, but more often we are looking at the one off results and discarding the historical data. What about that test that seems to fail every other week? It may have been mentioned between coworkers, but no one really knows its failure pattern, how it coordinates to product versions, etc. Tusk was designed to parse test results, store them in a database, and perform analysis on the database while improving debugging and testing workflow.


(Tusk Rest API)

I've since been drawn away, interested to work on other projects, but I did make enough progress that it is very close to a minimum viable product and can be functionally tested. Further, Tusk is a really good example of JSON serialization/deserialization using Go/Golang. Check it out at my GitHub.


Keeping Track of Skill Practice Hours (A JSON, JAVA Project)


I've been wanting to write program that allowed me to keep track of my practice hours for various computer related skills. Some years ago, I read a book by Malcom Gladwell that examined experts of various fields from athletics to music. Each of these experts had practiced their craft for at least an estimated10,000 hours. Eventually, I will surely reach this number with crafts like programming, but it would be hard to say when if I wasn't actually keeping track. So I wrote an interactive program to do just that.

I called it 'Keeper', and it's freely available to download on my GitHub if you want to check it out. 

How it Works: Keeper uses what I called 'trackers' to record events for specified skills. In the source, you'll notice that I used mostly computer languages as the skills you could track. This is a limitation of the example code, but in practice, you would not be limited to the number of trackable skills currently available. Once you've entered data, you could perform analysis and get the following data:
  1. What year did I practice X the most/least
  2. What time of day did I practice X the most/least
  3. Which skill did I practice the most/least
  4. etc
I really enjoyed this project, but when I showed it to a friend, they asked why I wouldn't just use Excel to do the same thing. I didn't have a good answer, so I have since switched over to using Excel. The project still serves as a couple good examples of using JSON to serialize, deserialize data.


Thursday, December 8, 2016

More Basic Computer Tutorials Uploaded

I've added a few additional "How to Do Stuff" videos to my Youtube channel today. The videos cover the following topics:
  1. How to use snipping tool to save photos
  2. How to install apps on mac that were not downloaded from app store
  3. How to exit and enter fullscreen mode on a mac
Check them out HERE!

SMB Client Behavior (Windows)

We do quite a bit with the SMB protocol at work, and occasionally we uncover little things that have haunted us for weeks or months. Before I jump into the interesting stuff, I want to explain what I mean by client behavior.

Client behavior is just what it sounds like. It is the behavior exhibited by a client using your application, server, service, etc. This cannot be controlled in any way since you have no presence on the system beyond the application or service used by the client. Most of the time this isn't an issue, but occasionally presents itself as a problem to solve form the server/application side.

During testing, we found that a Windows client that we used for mounting SMB shares would cache the share connection information even after the share was disconnected using something like 'net use /d.' But how did we figure this out? While getting a packet capture, we mounted a share to the Windows client, disconnected it, and then reconnected a few minutes later. The session information for the multiple mapping attempts were the same. After looking into it more, it turns out that a Windows client's Explorer.exe process will cache the connection information when shares are mapped. We have not been able to figure out when this cache is cleared, but since we use automation to perform testing, we can't afford to wait minutes or hours for the cache to clear to ensure new session information.

So, after a few talks about 'client behavior' I found a method of preventing this kind of 'convenience' from impeding our testing efforts. I present to you, the fix:

taskkill /IM explorer.exe /F; explorer.exe

Killing explorer?! Absolutely. Running this inside powershell took less than a second on the test machine and solved the unique problem.


Monday, December 5, 2016

SUNLABZ Fast Battery Charger

Update: Posted a short demo on Youtube HERE.

When I travel, I take my old gameboy advance with me. It's light, entertaining, and isn't too valuable if it does happen to go missing or get damaged. Unfortunately, the gameboy takes two AA batteries. It was too early to have its successor's rechargeable battery pack. This means I have been going through a ton of batteries, and it's a shame because each pair is only good for about 5 hours on the gameboy. I decided to invest in rechargeable batteries after realizing how much waste was being generated in such a short time.


I looked around and decided to go with the SUNLABZ fast battery recharger with 8 slots. Outside of my computer mouse, remotes, and gameboy, I don't use too many batteries so I figured the 8 slot was good enough. Packaging looked very good considering the price I paid (25.00 USD), and even comes with a pamphlet to explain use.


The advertisement on Amazon doesn't clearly state whether it takes all AA or AAA batteries or if you can mix them, but you can. Each slot can hold either which is nice.


Something that also isn't explained in the advertisement or in the pamphlet is the 'Refresh' button on the right side. I decided to play with it and find out. When you insert a battery, the LCD will light up and show a status indicator on the far left. Usually it says 'CHG' for charging, but you can also use this module to discharge the batteries. As the pamphlet informs you, sometimes discharging and charging the batteries will improve their life and use. If you hold down the 'Refresh' button, you will see the status change from 'Charging' to 'Discharging' meaning it is draining the batteries. Holding down the 'Refresh' button will change the mode back to 'Charging.'

One more thing.

I have sensitive ears, and if you're like me, you always hated watching anything on those old tube style televisions because of the high frequency whining that they generated. This thing whines. It's not particularly loud, and I imagine people are not keeping these chargers in their bedroom or anything, but just know that it does whine. The pattern goes something like, "Eeeeeee, click, Eeeeeeee, click, etc." Just for those curious, I used a frequency analyzer application on my phone, and it looks to be around 14 KHz. Again, not terrible, just would have been good to know.

(Spike on right is the whine from charger)

Overall, awesome product so far. Takes a while to charge, but it beats wasting so many non-rechargeable batteries.


Saturday, December 3, 2016

"How to Do Stuff" Channel is Live on Youtube

I finally got around to making my tutorial videos and as of this post, I have uploaded eight videos. Currently, I have three main platforms for the tutorials (Mac, Windows, IPhone), but plan on expanding to more general playlists such as "MS Word, Internet, and Recording."

My goal for the videos are that they all follow a few simple guidelines:

  1. They are under a minute long. Too many tutorial videos on Youtube spend minutes talking about "why they wanted to make the video" instead of actually getting to the content.
  2. They are informative. The videos should empower the viewer to do things they didn't know how to previously do on the given platform.
  3. They are accessible to everyone. You shouldn't need experience with computers or technology in order to accomplish any of the tasks I demonstrate in the videos.
Check out my channel HERE!

If you have a request for a video, let me know in the comments or send me a message.

How to Use RXTX Library for Java & Arduino Communication


I have been thinking about doing this project for a while, and since I've been riding a tech/craft wave lately, I thought there was no better time. *Note to reader, this tutorial is crafted to a Mac OS X environment and its quirks, if you need a tutorial for another environment start here: Arduino Java Interfacing Tutorial
What: Programming an arduino and java application to perform serial communication.
Why: Why not?! Think about it. Once you have that neat arduino project, you add in 'duino-PC communication and now you're really taking it to the next level! Back during my computer science undergrad, I built an anemometer for an IEEE event when I was first getting started with arduinos and learning about EE stuff. When it was hooked up to the arduino IDE, I could read its output values, but that's it. Now, if I was to hook it back up, add in some serial communication, I could start logging that data! If logging data doesn't do it for you, there are tons of other things you can do with this. Let's get started.
Things you will need:
-Arduino : I am using an Arduino Uno v3
-Computing Environment : I am using a Macbook Air running OS X El Capitan (10.11.3) with Java 1.8, and coding my application using Eclipse.
-RXTX Libraries : Can be downloaded at: RXTX Libraries (Warning - If you need the 64 bit libraries, you will have to source them elsewhere. If you need the more rare mac os x 64 bit JNI library, you can get it here: RXTX 64 bit Library)
Getting Started: The first thing you want to do is download the correct RXTX libraries and install them. You can add them as extensions to the java runtime environment you have installed or load them into your project directly. What's the difference? Well the guys who built the binaries for RXTX say that adding them directly to your runtime environment can be dangerous if you are writing cross platform functionality. If you are not concerned, copy the libraries (.jar and .jnilib) to the path "/Library/Java/Extensions". You will likely need to provide your password in order to modify this directory. If you are concerned, copy the libraries into your project using an IDE like Eclipse, add them to your classpath in your makefile, etc.
Once that is done, copy the code example from the tutorial in the following link: Arduino Java Interfacing Tutorial. It is important that you understand each step of the code and what each piece accomplishes. This will allow you to improve upon the example code in whatever ways your project demands. I will be posting a heavily-commented version of this tutorial to my github at the following link: Basic Tutorial
Status check. You have the libraries installed, you have the source code, arduino is ready to go. Plug that arduino in and run your program. I bet you probably got an exception didn't you? Follow the error resolution steps and see if it can't get you unstuck.
Error: "java.lang.UnsatisfiedLinkError"
Solution: You are on a newer Mac and have a 64 bit architecture running with a 32 bit library. Download the 64 bit JNI library I linked to above.
Error: "gnu.io.PortInUseException"
Solution: Create a directory named 'lock' in the path '/var' with permissions 777. If you are not sure how to do this, open a utility application on your mac called Terminal. Next, type the following command and then hit enter: 'sudo mkdir /var/lock'. It will likely prompt you for your password. Next, enter the additional command and hit enter: 'sudo chmod 777 /var/lock'.
Good job! If you made it this far, you should be past all the frustrating parts, and your arduino is happily chirping "Hello World" over and over into your console! What's next? Experiment and add functionality for sending data TO the arduino. Good luck!


Playing with Computers at Work (I/O vs Compute)

I used computer science at work and it was fun.
A coworker and I were talking just the other day about a situation where our code would need to enumerate every open file for a given process. We had a binary tree structure in memory that maintained the list for our process as well as the option of retrieving the information via '/proc'. Since we needed to touch every element in our tree in memory, that's easily identifiable as O(n), but what was unclear for our now group of four deliberators was whether the enumerating of the /proc/[pid]/fd file would be just as fast, faster, or slower. Ultimately, a couple of them settled on the fact that it would be the same speed since you still needed to enumerate every file descriptor, and it would be just as fast to make the system call to retrieve the proc info. I disagreed. My argument was that compute is always going to be faster than I/O, and even though it's a system call to a pseudo-filesystem, it makes sense to crawl the tree instead of getting it from proc. To prove my suspicion, I created the following experiment:
1. Run a program that opens and holds 2**x file descriptors.
2. Run a script to build a tree of 2**x levels in memory.
3. Using the same script, walk the tree using a depth first search. (Time this function)
4. Using the same script, attempt to read the list of FDs from /proc/[pid]/fd. (Time this function)
5. Compare the result of the function timers.
Results: At 10 levels, the tree enumeration took 0 milliseconds, while the I/O required about 55 milliseconds to complete. When I increased the size of the tree to 16 levels, the time required to walk the structure increased to around 25 milliseconds. Compute was faster.
Notes:
1. This is not bleeding edge accurate. The python package 'psutil' is essentially a piece of middleware that could influence the time it takes to return the list of file descriptors, but I think still accurately simulates what enumerating the proc file would require.
2. The accuracy of the time.time() value used for the experiment is two decimal places on my test machine.
You can find the experiment files HERE.

Converting JSON to a Slice in Golang


*This tutorial does not cover coding up a simple webserver, but that is implicitly part of my explanation. However, you do not need a webserver component to use the instructions below. You can 'mock' the API call to the webserver using a simple function that returns a pre-made JSON string.
What: Parsing a JSON object into a slice in GO/Golang.
Why: I've been working on a pet project and wanted to learn a couple technologies that were new to me. I decided I wanted to build a web service that has an outward facing API for handling queries and uploads for a database. Because I had used XML in the past, and found it a little too verbose, I wanted to learn about and use JSON for this project. Once I received the JSON from the user, I could parse it into an instance of my class and then use it programmatically.
Procedure: In order to accomplish this, we will need to code up a few things. First, we need a class that represents the JSON object you are expecting to handle. Here is a simple class we can use for our example:


type MyOptionClass struct {
    Name string `json:"name"`
    Option string `json:"option"`
}
Additionally, here is a JSON string representing two of MyOptionClass objects:


[
  {
    "name":"optionname1",
    "option":"pushLevelUp"
  },
  {
    "name":"optionname2",
    "option":"pullLevelDown"
  },
]
Next, we need a function that is going to parse the JSON object that is retrieved from the API call by the user. Let's say, for example sake, that our API receives any amount of JSON objects. The following function can then parse that JSON into class instances that we can work with programmatically:


func ParseJson(jsonObj []byte) {
    var optionClassArray *[]MyOptionClass
    ...
    json.Unmarshal(jsonObj, &optionClassArray)
    for _, val := range *optionClassArray {
        NewMyOptionClass(val.Name, val.Option)
        ... or do something else with val ...
    }
}
The important stuff to note is the specifics of what type of objects we are passing to the Unmarshal call. During my trials, I found that it works best to send the address of a variable which is of type pointer to an array of your class type. That's hard to follow, but if you refer to the example above, you'll get it.
From this point you could append each class instance to a slice and return it, print out the values of the json object, or anything else.
Common Errors:
  1. Unmarshal isn't parsing any of the fields from the JSON into your class:
    1. Solution: Validate the JSON being sent from the client using an online validator.
  2. Some of the fields are blank in your class instances parsed from the JSON:
    1. Solution: Make sure your JSON fields and Class/Struct fields are the same/line up.
Good luck!
*Disclaimer: I do not own the images that compose the banner image. If you hold the rights and would like me to remove the images, please contact me and I will do so.

Travel Tips for New Zealand 2016


Foreword: Last year (2015) I decided that my wife and I were going to fulfill a long time dream of traveling to New Zealand. We planned the trip and made all the arrangements ourselves. They are not ranked in any particular order. These tips are given from a western world perspective, and I suspect western travelers will probably find it more useful.
1. Most of the Roads are Bidirectional, Single Lane
What: This is probably the biggest one. What do I mean by single lane, bidirectional? It means the roadways are single lanes in both directions. Though there are occasional passing lanes, and I mean occasional,  the majority of the time you are going to be driving into oncoming traffic in order to pass other drivers. Almost every city or town is connected by roads like this.
Takeaway: Always leave extra time for driving. If you don't, you may find yourself risking unnecessary head-on collisions.
2. Use ATMs to Exchange Currency
What: If you need to exchange your currency into New Zealand dollars, wait until you arrive and use the ATMs. Using an exchange office will run you a significant tax resulting in less currency for travel. Using an ATM should only tax you for the withdrawal fee.
Takeaway: Using ATMs to get local currency is almost always cheaper unless you can pay in your national currency (only found this as an option once).
3. Towns Close Down at 5:00pm
What: Most of the towns, big or small, close down around 5:00pm. When you really think about it, this makes sense for a couple of reasons like energy conservation and family/friend time. This will come as a shock to most westerners who are used to cities with Walmart and always open fast food restaurants, but it's not how they do business in NZ.
Takeway: Get all your shopping done before 5:00pm or have groceries already purchased. If you arrive late into a town you are staying in, chances are no one will be at the hotel to receive you or the local food joints will be closed. Queenstown was our 5th or 6th day on the ground in New Zealand, and when we asked what time the town closed down they laughed at us, so this isn't a rule everywhere, just a custom in most places.
4. Food is Different
What: This should also be pretty obvious, but the food is going to taste very different. Not only do food makers change recipes depending on region, but different governing bodies also have different regulations. In short, the difference is that NZ food has much less sugar, and much less salt. We found this to be a good thing, but again was a surprise. The first couple times we found ourselves saying that the food was bland, but once you realize how much salt and sugar U.S. American food makers add to the food, you can see that the food is not bland, just more natural. Additionally, it is important to note that there are next to no vegetarian options which resulted in us making our own food for almost every meal.
Takeaway: Food has less sugar and salt, and tastes more natural, but good. Being vegetarian in NZ is not a thing; make your own meals.
5. Holiday Parks are Where to Stay
What: Holiday parks are similar to what U.S. Americans will think of as motor lodges or motels. Our goal was to stay in 'nice' places, but not 'expensive' places. This is of course relative to the traveler, but for us it meant having an attached toilet and shower room to our guest room. We traveled at the beginning of autumn, so the busy season was just ramping down. Because of this, most of the rooms cost us between 70 & 100 US dollars for a night. Each of the rooms we stayed in were probably the size of a small apartment or larger. Our 'we feel like kings' accommodation was actually a 4 person lodge in Tongariro National Park and it probably cost no more than 100 USD.
Takeaway: Staying at Holiday Parks, either by camper or by room, is a cheap and comfortable way to see New Zealand while still having access to luxuries like attached showers and toilets. All our accommodations had included kitchens as well.
*I will end up posting more about New Zealand since it was, and will remain, a big part of our lives. Stay tuned!

Interviewing for Google 2016


Foreword: Hopefully this provides other candidates, both accidental and intentional, some insight into Google’s interview process after their reported interview changes have gone into effect. My goal is NOT to show saltiness for a company that has given me so many good search results over the years.
Part 0
“Surprise”
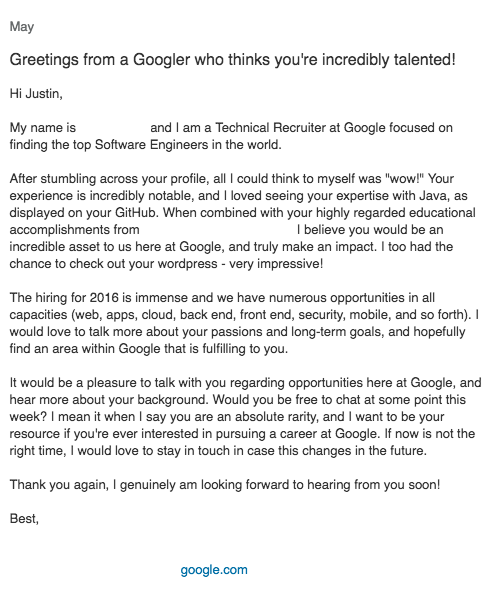
In spring of 2016, a Google recruiter reached out to me via LinkedIn and asked if I was interested in applying. The message gave me pause for a couple of reasons, but the first was because of the actual content:
contact_edit
Of course I was blown away. Google thinks I’m an asset?! So I kept reading and eventually got to the part about my Github, notable experience, and being a rarity. I need to take a detour here for reasons that will hopefully become obvious. If you have looked at my Github, you’ll see that there isn’t anything really spectacular on it. I haven’t contributed to any open source projects. I don’t have proof of concepts for a new algorithm solving the Traveling Salesman problem. So, what did the recruiter think was so incredibly notable? It doesn’t matter and that’s the point. Their job was to get my attention, and they did that.
The recruiter and I corresponded for a while before we scheduled a phone call to check that I wasn't a robot. We eventually spoke on the phone for an hour about what I did at my current position and what sort of technologies I was interested in working on. They were very polite, very genuine, and seemed very interested in getting me to the next stage. I explained that I had reservations about applying for Google since they have turned away markedly impressive peopleThey assured me that their processes have changed and are more down to earth now (Google no longer asks the brain teaser questions they were known for). The recruiter seemed to like me enough to let me know that if I wanted to continue with the process they would get me scheduled for a technical phone screen. “Why not” is sort of my motto, so I asked them to schedule me for a phone screen with a tech.
Part 1
“Preparation”
My very awesome recruiter sent me a couple emails on how to prepare for the technical phone screen. The email included video links and recommendations for subjects to look at before the call. I had about one week for preparation, not to mention needing to fulfill my full-time engineering responsibilities at work and preparing for a conference the following week.
*Note: Your Google recruiter will tell you that you can have as much time as you want to prepare. It’s the only company I’ve ever known to willing give you months (I was offered two months) to prepare from the time of application, to the time of the phone screen. This is either incredible or confusing. Why do I need months to prepare…for a phone screen(not even an interview)?
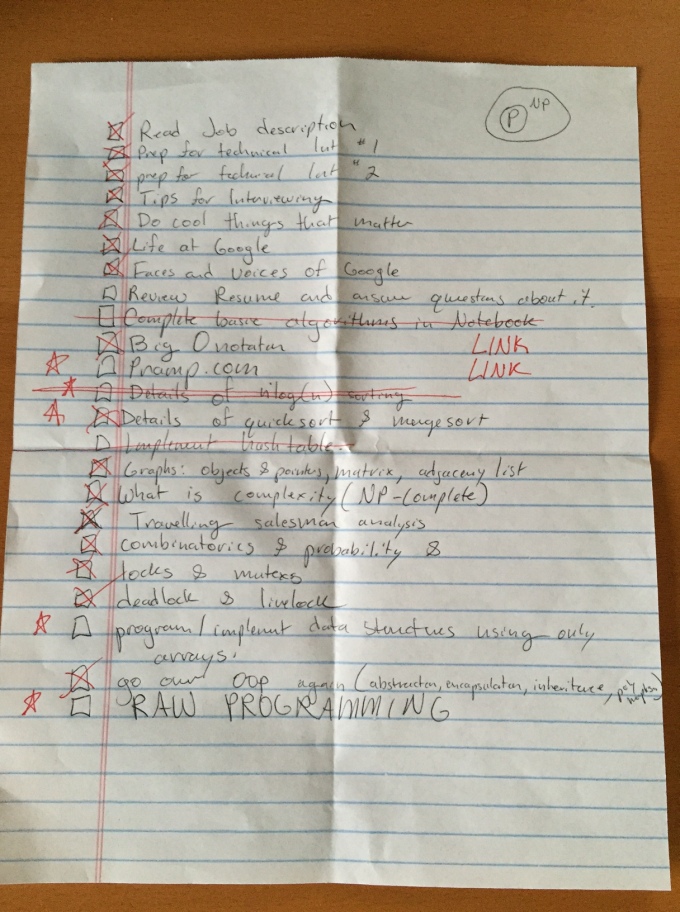
Here is my short-list of things I wanted to refresh on that I picked out of the email:
IMG_2294
Most of the things on my list I felt made excellent topics to look over since I hadn’t seen all of them in the wild after graduating. For this round, I didn’t use any additional guides or resources beyond what I could find online.
*Note: Everyone, all the Google videos you watch, and all the resources you read will tell you to constantly “Say what you are thinking.” This is misleading. What they should be telling you is, “Say or present the answer to the problem you are given immediately, and then give a sentence or two that supports how you know the solution or algorithm is such.”
Part 2
“First Call”
A week later I had a call with a very nice gentleman who worked in the Youtube Advertising department. He didn’t ask me anything about myself and started promptly with the technical questions. In order to comply with not disclosing the questions I was directly asked, I will provide general examples of what he focused on. The first part of the interview focused on core questions involving my knowledge of data structures. No coding necessary for this part. The second part involved writing a single function to perform string manipulation. This part was fairly straightforward and I was able to produce a solution with ten minutes left. However, through out the coding exercise the gentleman would sporadically insert his cursor in the middle of a code snippet I was actively working on and make changes regardless of what I was doing. I won’t say this was a bad thing, but it was definitely jarring. It was similar to a peer programming session, but if the other person you were coding with had a keyboard and mouse active to the exact machine you were using, trying to code at the same time. Finally, the last portion of the interview involved him asking me to analyze the complexity of the function that I had written. Here is where I screw myself over.
I went through line by line explaining how the for loop was going to at least be O(n) and each assignment had a constant time of O(1). They don’t want you to do this! I thought I would build my case for O(n) before arriving at the conclusion of the big O time complexity being O(n) for the overall function I wrote. What they want you to do is state, “The function's complexity is O(n), and I immediately know that because of <insert supporting arguments>.” This mistake interpreting the, “Say everything you are thinking” cost me the phone screen.
The next day, my super awesome recruiter called to say that the tech’s feedback was borderline. They told me that my interviewer thought my skills and knowledge were excellent, but that my speed at analyzing the complexity was far too slow. Color me surprised. I explained to the recruiter how I made sure to explain and vocalize everything I was thinking and that if I realized he was looking for a prompt answer without support, I could have given it to him. They asked if I felt like trying again and I said sure.
*Note: Any information, aside from feedback from your tech, does not get passed between the different components of the process you will interact with. Information communicated to your interviewer, recruiter, or other HR proxy has no guarantee of making it to other appropriate parties. Do not make the assumption that your recruiter communicated anything about you to your actual tech screener.
**Note: Being awesome to your recruiter means they are going to be awesome for you. Without such an amazing recruiter, I likely wouldn’t have gotten a second chance, but because of them, I did. These people are your ticket.
Part 3
“More Preparation”
At this point, I felt pretty good about my abilities, but just needed to curb how I talked to the phone screener. My awesome recruiter told me I should go purchase a book called “Cracking the Coding Interview.” I didn’t immediately think I needed it since I did well on my first round, but I decided to get it to prepare myself on things I hadn’t thought of yet. The book was extremely helpful in understanding how each of the big five tech companies hire people and the kinds of things they are looking for. I spent about one and one half weeks with the text working the various problem sets. In total, it was probably an additional twenty hours preparing for the second phone screen. Eventually it was the day before the phone call and I felt prepared enough and ready to repeat my performance with a greater emphasis on quickly asserting any answers.
Part 4
“Trees”
I sat anxiously at my computer with my headphones in waiting for the second tech screener to call. At two minutes past the hour, I received a phone call from my second screener. We exchanged pleasantries which was a welcomed change from the first screen and then he asked me about what I did in my current position as well as about a personal project I had worked on. I spent four minutes explaining these things to him before he said, “Okay, I didn’t think that would take so long.” I found it rude to say the least since he asked me questions and then backhandedly scolded me for it.
The screen wasn’t off to a great start. Again, I was asked not to disclose the exact questions I was asked, but I can give you some idea about the content. This screener asked me to code up a couple classes and a function that could find a specific type of path for a tree with any given structure; binary or not. I realize this is incredibly vague, so in solidarity with you the reader, think about what Dijkstra’s algorithm does. My preparation mattered not as I tried to propose a solution that would work for an even reduced version of the problem(In fairness, I had not done a significant amount of preparation on trees yet). He was kind enough to inform me at each step that my solution wasn’t doing what I thought it was and that I should try a recursive algorithm. With only a few minutes left I informed him that there was no way I could conceivably reverse my state and that I would appreciate if he gave me my inevitable feedback upfront instead of waiting for my recruiter to call and tell me the same. He told me he could not legally do that, so I asked him to allude to it. He told me, “Lots of engineers have to apply more than once. I myself has to apply twice.” I thanked him for his time and we hung up.
Part 5
“Aftermath”
Afterwards, I wrote my super awesome recruiter an email and told them that I knew I had bombed the second phone screen and that I appreciated all their hard work over the last month. They wrote me back to give me the official legal response that is, “With this, we will not be going forward with the process.” We both decided to keep in contact in the event that I was interested in applying in the future.
Good luck!
* Additional Notes: (Contains Personal Opinion)At the end of a call, when recruiters, techs, screeners and the like ask if I have any questions, the first thing I always ask is, "What do you enjoy most about your job?" It's a fairly open-ended question and allows me to get a feel for what I might like about the job if I worked for that particular organization. I asked my recruiter what they liked most about their job and I believe they said something along the lines of, "The people are so great." I asked the same thing to my first tech screener and he said verbatim, "Everyone knows who Google is. Why wouldn't you want to work here?" This answer wasn't what I was looking for, so I pressed him a little more. "The benefits are incredible." I understand that we all have different motivations for the choices we make, but having a well known name and good benefits doesn't really convince me that your org is a good place to work. I am already familiar with the fact that not everyone has a passion for this stuff, and for many it is just a job with excellent pay, but I was very surprised that the best thing my tech screener could identify about his work life was that it had incredible benefits. Unless you are currently destitute, we forget that an interview process is two sided. They need to convince you to work for them, just as much as you need to convince them that you could.
Canary: At this time, no organization, private, government, or otherwise, has prompted/coerced me to edit or remove the content provided in this blog entry.

Setting Up Jenkins At Home


What: I'm going to walk you through setting up Jenkins on your home server.
Why: A recent phone call got me thinking. I knew how to use Jenkins pretty well, but I've never actually been through the process of setting it up on a server. Also, Jenkins is an impressive and widely used automation tool that can do all sorts of things for you, so why not set it up at home?
Environment: I'll be setting up Jenkins on a HP Microserver Gen8 running Ubuntu 14.04 LTS. With that, though some of the steps may apply to other linux distributions, it is tailored for Ubuntu 14.04.
Getting Started:
1. Install OpenJDK8 if you do not already have it installed. Ubuntu did not have the source in its software repository so an <apt-get install openjdk-8-jdk> didn't work for me. If you encounter the same, go ahead and add the webupd8team repository: (Note: The commands include everything inside the first set of "<>" brackets)
<add-apt-repository ppa:webupd8team/java>
<apt-get update>
<apt-get install oracle-java8-installer>
<apt-get install oracle-java8-set-default>
2. Next, install the Apache 2 web server.
<apt-get install apache2>
3. Finally, after you have taken care of its dependencies, it is time to install Jenkins! Only... it also isn't in the Ubuntu repository list. Worry not! We'll do the same thing we did for the OpenJDK8 repository.
<wget -q -O - https://jenkins-ci.org/debian/jenkins-ci.org.key | sudo apt-key add ->
<sh -c 'echo deb http://pkg.jenkins-ci.org/debian binary/ > /etc/apt/sources.list.d/jenkins.list'>
What did we do? The first command adds the repository key to "apt" package manager so Ubuntu can validate it is indeed getting the software from where it believes it is. The second step adds the Jenkins software source list to the "apt" package manager list of sources. Now "apt" knows where to find Jenkins and has a key to validate the software.
<apt-get update>
<apt-get install jenkins>
Update your package manager cache and install Jenkins. When you are ready to start configuring Jenkins, navigate to http://yourhostname:8080. You're done!
See my next post on configuring your newly deployed Jenkins server.